DIY paper Halloween lanterns
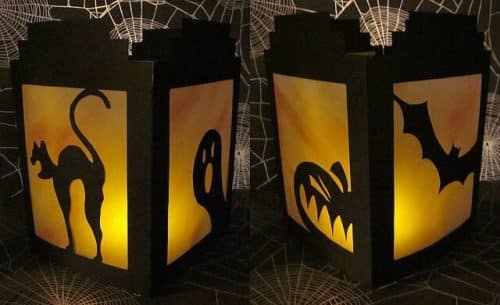
Making your own Halloween lanterns is fun and when they are done you have a cool new Halloween decoration. These look really cool with a candle or electric tea light inside of them. This is a project that kids can participate in too, with a little help from an adult. Happy Halloween crafting!
Here’s what you need:
White chalk
Four pieces of black card stock
Four pieces of vellum
An X-Acto knife
A tea light or electric tea light candle
Here’s what you do:
- Take your black construction paper and cut four pieces so that they are 5 inches wide and 7 inches tall.
- On all of the pieces, fold the long ends an inch inward toward the side that will be the inside of your lantern. You are making flaps that you will tape together to create the lantern.
- Draw a border an inch and a half in on each of your sides so that it looks like a frame. Use some white chalk to draw designs you want such as bats, cats pumpkins etc. inside the area of these frames. The design need to be attached to the frame, because you will be cutting around them and you don’t want to cut them out!
- Use an X-acto knife to cut the paper out around your shapes. Use the chalk marks as your guide.
- Then cut pieces of vellum so that they can be taped to the inside part of each side of your lantern. Use your Darice double sided tape to secure the vellum on all the inside lantern frames.
- Now use the Darice double sided tape along all of the flaps and stick them together. Just light a small tea light, and you will have a beautiful and festive lantern!