How to make a recycled quilt
Many people think of spring cleaning as a time to rid your home of excess clutter that’s made its way throughout the years. If you’ve got extra sheets or bedding laying around, you can transform your favorite vintage sheets into a cozy quilt. Recycling your blankets is an easy project that doesn’t require and special equipment or prior quilting experience. If you’ve never made a quilt before, this project is a great introductory to quilting and you can use your finished product to revamp the look of your home interior or room.
What you’ll need:
- Two sheets
- One blanket
- Scissors
- Large safety pins
- Sewing machine
- Thread and 1 hand-sewing needle
- Yarn
What to do:
*Before you get started with this project, make sure you have enough floor space around you to lay each sheet out proportionately.
- Lay the two sheets out, right sides together. Your blanket (which should be fairly thin) should be hidden in between both sheets so be sure to check for any signs of dirt or rip on your sheets.
- Once you’ve placed your blanket atop the sheets, you’ll want to place safety pins on the blanket, pinning all three layers together. Be sure to pin at roughly 3-inch intervals in order to achieve the complete quilted look. Once all three layers are pinned together, you are free to move your piece around to cut and sew.
- If you’ve got extra or uneven material around the edges, trim the sheets and blanket to the same size.
- Machine-sew the layers together around the sides. These can be hand-sewn but if you’re more machine savvy, you’ll save extra time with this step.
- Trim the blanket close to the seam (this will take more bulk out from the seam and allow you to turn the quilt right side out more smoothly).
- Turn the quilt right side out. You can easily hand-sew the raw edges closed after and remove all the safety pins.
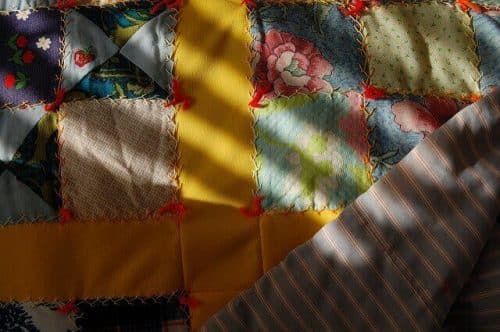
- To finish off your project, you will need to bind all three layers of fabric together. With your piece of yarn, take your large-eyed needle and take a small stitch through all layers of the quilt. Make sure you pass all the way to the bottom sheet.
- Once you’re done with each stitch, trim the yarn so you have two lengths of about 2 inches sticking up from the quilt. Tie the ends in a tight double knot and trim to about half an inch.
Keep in mind that you can place your ties in any configuration or pattern you like. The main idea is to spread them in a way to where your blanket doesn’t shift around within the sheets. You can measure the distances between each tie, but I find that lining them up visually works easier and looks just as great! You can design a baby boy blanket personalized
