DIY sparkle shirt
Please follow and like us:
When it comes to home made items,there are few things more satisfying and useful than home-made and hand-made clothing.This is a do it yourself project that you can not only take satisfaction in having made yourself from scratch – no indeed it’s much more than that. This is a project that you’ll actually be able to wear and take around with you in your daily life. The best kind of do it yourself project is one that will really last you a long time, and this is exactly that. Today we’re going to take a look at how you can design and create your very own sparkly shirt! Also, keep in mind that the techniques we go through here can be used on other items of clothing as well, such as fun knit skirts
What You’ll Need
- A pair of same sized button up shirts or t-shirts. This part is a bit optional – you can use just one shirt to simplify this project.
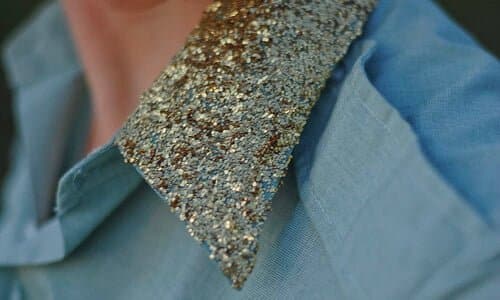
- Glitter and sparkles.
- (optional: Swarovsky crystals or mother daughter sister jewelry
).
- Superglue or a hot glue gun.
- Needle and sewing kit.
What To Do
- You’ll want to start off by taking a couple of shirts of contrasting colors. As mentioned before, this step is a optional – if you’d like to simplify the project, simply take a shirt you’d like to use, and skip ahead.
- If you chose to use two shirts, you’ll want to cut them in half and sew them back together with your sewing kit along the backs seem – this will create a fun two-toned shirt.
- Using a light coating, use your sprinkles liberally along the lapels and sleeves of the shirt.
- The crystals, or rhinestones, should be applied to the back and front of the shirt. The simplest method involves simply spacing them at random, however you can also create fun patterns and designs. In either case, you’ll want to apply each stone individually with a superglue stick or a hot glue gun. Enjoy!